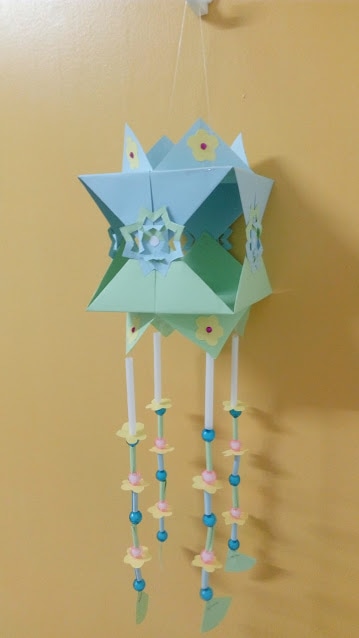
How to make a simple paper lantern?This image is by me. If you cannot understand my instructions below, please make sure to have a look at my slideshow at the end. Do you want to decorate your house? If you do, make a simple lantern! It is very easy to make, and it will not cost you that much money! If you are a fast person, you might make it in less than an hour! You will need 5 -6 A4 size colored/white papers, yarn/thread, tape, stapler, pair of scissors, and a glue stick. You could also use other materials like stickers and beads, but they are optional. Most importantly, you need to have secret ingredients; patience and creativity! First, make sure that you have gathered all the materials near you. Then, take one paper and cut the biggest possible square from the paper. In this process, a vertex of the paper should meet the edge of the paper. If you did that properly, your paper must look like a trapezoid. Next, fold the other rectangular part and cut it, but do not throw it! Now you should have a folded square and a rectangular piece. Keep the rectangle aside, and open the folded square. Fold the square into four, and open again. Next, fold each vertex to the center point of the square. After that, flip it over and fold the vertices to the center. Do the same thing to another paper. Then, open the last four folds of each square and staple them together. Now you must have draft of your project. It may look very bad at the beginning, but I assure you will have a nice result at the end. Cut 4 paper designs by using 4 circles, and stick them to cover the stapler pins. Afterwards, make 20 tiny flowers and 16 straws from the papers which are left. Then, put stickers in the middle of 8 flowers, and stick them on the triangles which are at the top and the bottom. Next, make holes on other flowers by using a sharp object. After that, attach a half circle paper at the end of yarn to make sure that those things don't fall. Later on, pass the flowers, straws and beads through the yarn in any order you like. Then, neatly tape it to the lantern by using tape. Now, put it gently on the table. Lastly, tape another piece of yarn on two opposite corners on the top. There you go; your project is officially done! I hope you had fun! Oh, did I mention that I love my commentators? Please kindly leave a comment if you have any stars, wishes or wonders! Here are some posts which are similar...
http://ohhappyday.com/2013/05/homemade-paper-lantern-diy/ http://creately.com/blog/diagrams/how-to-make-a-vesak-lantern-infographic/ http://innerchildfun.com/2013/07/how-to-make-easy-paper-lanterns-japan.html
16 Comments
Hi Thanumi,
Reply
Thanumi
4/28/2017 02:22:28 am
Hello Miss. W!
Reply
Lauren
5/8/2017 02:52:57 am
Hi Thanumi. The way you showed two different ways to make a paper lantern was so creative.
Reply
Thanumi
5/11/2017 08:49:04 am
Hi Lauren!
Reply
Lauren
6/8/2017 02:23:16 am
Hi,
Thanumi
5/11/2017 08:58:17 am
Hi Devi!
Reply
Karli
5/9/2017 08:37:05 pm
Hi, Thanumi,
Reply
Thanumi
5/11/2017 09:05:46 am
Hi Karli!
Reply
7/13/2018 01:21:37 am
this is very good, do you have any other good thing to make ? please reply me
Reply
2/19/2019 04:22:48 am
If you have faced an injury situation during any activity then it''s time to visit the best personal injury attorney in Orlando.
Reply
11/21/2019 06:45:27 am
Great post. I like this post. Thanks for sharing this useful information.
Reply
Leave a Reply. |
About me...Hello! Welcome to my very own first blog! Want some translation?
Recent 10 posts...
|


